
Route a single app through WireGuard on Windows
The official WireGuard client for Windows routes traffic by destination (AllowedIPs), not by application. If you want only one program — a browser, a game, a torrent client, a work tool — to use the VPN while everything else stays on your regular connection, you need per-app split tunneling. This guide shows how to do it with WireSock Secure Connect in about five minutes.
What you need
- Windows 10 or 11 (x64, x86 or ARM64). Windows 7 is not officially supported, but we try to keep it working and users report that it does; the CLI edition — fully functional, without the UI — is the safer choice there.
- A WireGuard configuration file (
.conf) — from your own server or from any VPN provider that offers WireGuard configs. WireSock Secure Connect is a client; it does not include VPN servers. - WireSock Secure Connect — free for personal use. Download
Step 1 — Install WireSock Secure Connect
Download the installer for your platform and run it. Installation needs administrator rights once; after that, connecting and managing tunnels works with a normal user account.
Step 2 — Import your WireGuard profile
On first launch the application asks for a profile. Click Browse and select your .conf file, or drag and drop it into the window. The profile appears in the list on the left. Details and screenshots: Import a profile.
If you already use the official WireGuard client, export the tunnel there (Export all tunnels to zip) and import the .conf from the archive — the format is the same.
Step 3 — Choose the app to tunnel
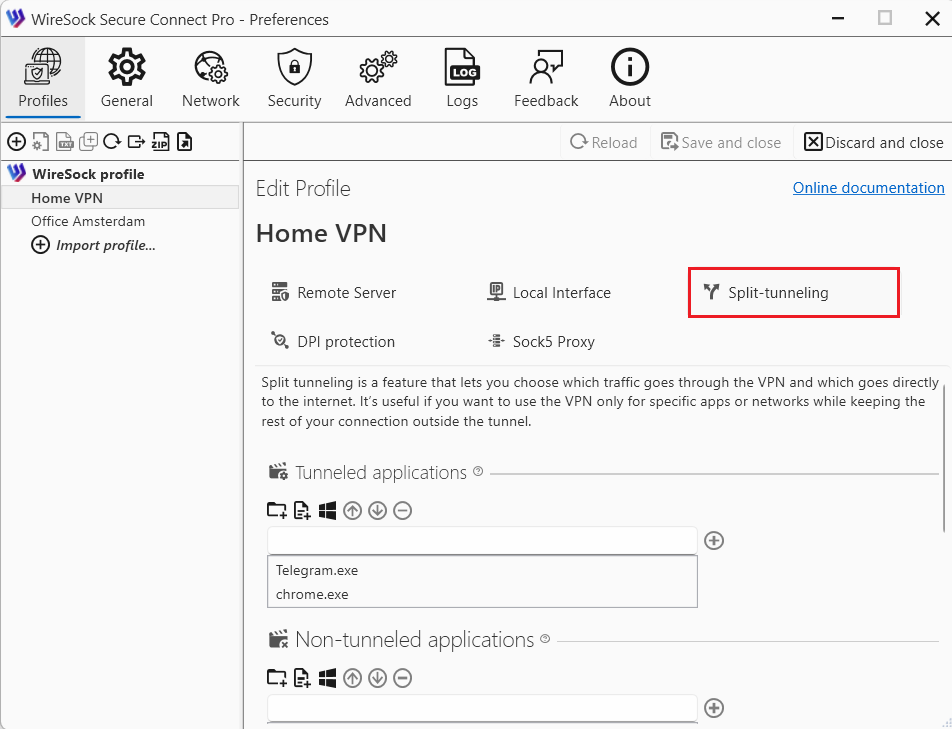
- Open Preferences → Profiles, select the profile and open it for editing.
- Go to the Split tunneling section and open Tunneled applications.
- Add the application in one of three ways:
- Add process — pick it from the list of running programs (easiest: start the app first);
- Add file — browse to the
.exe; - type the process name in the field and press + —
chrome,Discord,qbittorrent(the.exeextension is optional).
- Leave Tunneled networks/addresses as it came from your config (usually
0.0.0.0/0, ::/0) — this means "any destination", and the application filter narrows it to the app you chose. - Save the profile.
Same rules for every profile?
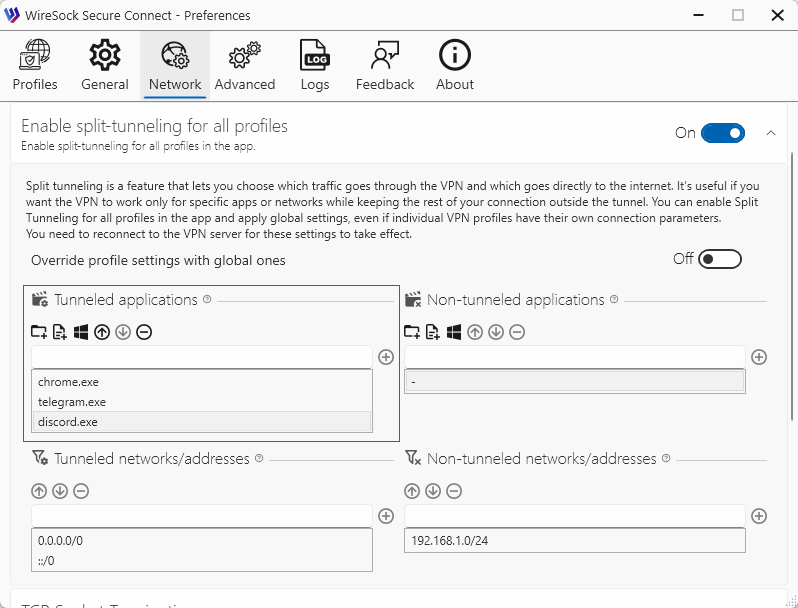
You don't have to repeat the list in each profile. Open Preferences → Network and add the applications there once — global rules apply to all profiles, and a profile's own rules override them when you need an exception. Details: Split tunneling.
TIP
- Several apps: add each one, or use a wildcard —
ch*matches every executable whose name starts withch. - An app that spawns helper processes (browsers, launchers, games with anti-cheat) sometimes needs its folder instead of a single file: use Add folder and point at the installation directory.
- Two programs with the same executable name: add the full path instead of the name.
Step 4 — Connect and verify
Connect the profile. Then check that only the chosen app goes through the VPN:
- In the tunneled app, open wiresock.net/tools/check-ip — it should show the VPN server's IP and location.
- In any other browser or app, open the same page — it should show your regular IP.
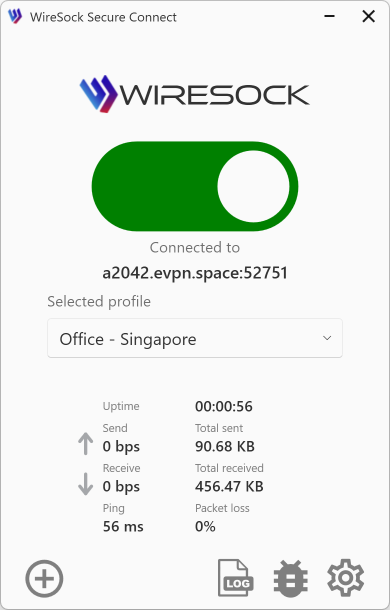
Since version 3.6 the split-tunneling status is shown directly on the main window, so you can see at a glance which mode is active.
The opposite case — everything through the VPN except one app
Use Non-tunneled applications instead: leave Tunneled applications empty (all apps use the tunnel) and add the exception — for example your banking app or a corporate CRM — to Non-tunneled applications. If the same app is listed in both, Non-tunneled wins.
Doing it in the config file instead
Prefer text? Add one line to the [Peer] section of your .conf and import it:
[Peer]
PublicKey = ...
Endpoint = ...
AllowedIPs = 0.0.0.0/0, ::/0
AllowedApps = chrome, Discord
DisallowedApps is the equivalent for exclusions. Full parameter reference: Advanced configuration parameters.
Common questions
Does this work with my provider (Mullvad, Proton, AirVPN, …)? Yes, with any provider that gives you a standard WireGuard .conf. Import it as described; the per-app rules are added on top, on your machine.
Do I still need the official WireGuard client? No. WireSock Secure Connect replaces it; running both at the same time on the same tunnel is not recommended.
What about DNS? DNS is system-wide on Windows, so it is not split per application. If your profile has a DNS = line, WireSock applies that server while connected and DNS queries go through the tunnel. Without a DNS = line, Windows keeps its current resolver; whether those queries enter the tunnel depends on AllowedIPs, and a resolver on your local router (e.g. 192.168.1.1) may stop answering while the tunnel is up. If you run into DNS problems, add a DNS = line to the profile — your provider's resolver or a public one.
Is this free? For personal, educational and non-profit use — yes. Business use requires PRO, which adds deployment and lockdown features but uses the same split-tunneling engine.