Setting Up a Wi-Fi Hotspot on Windows with WireSock VPN Client
Introduction
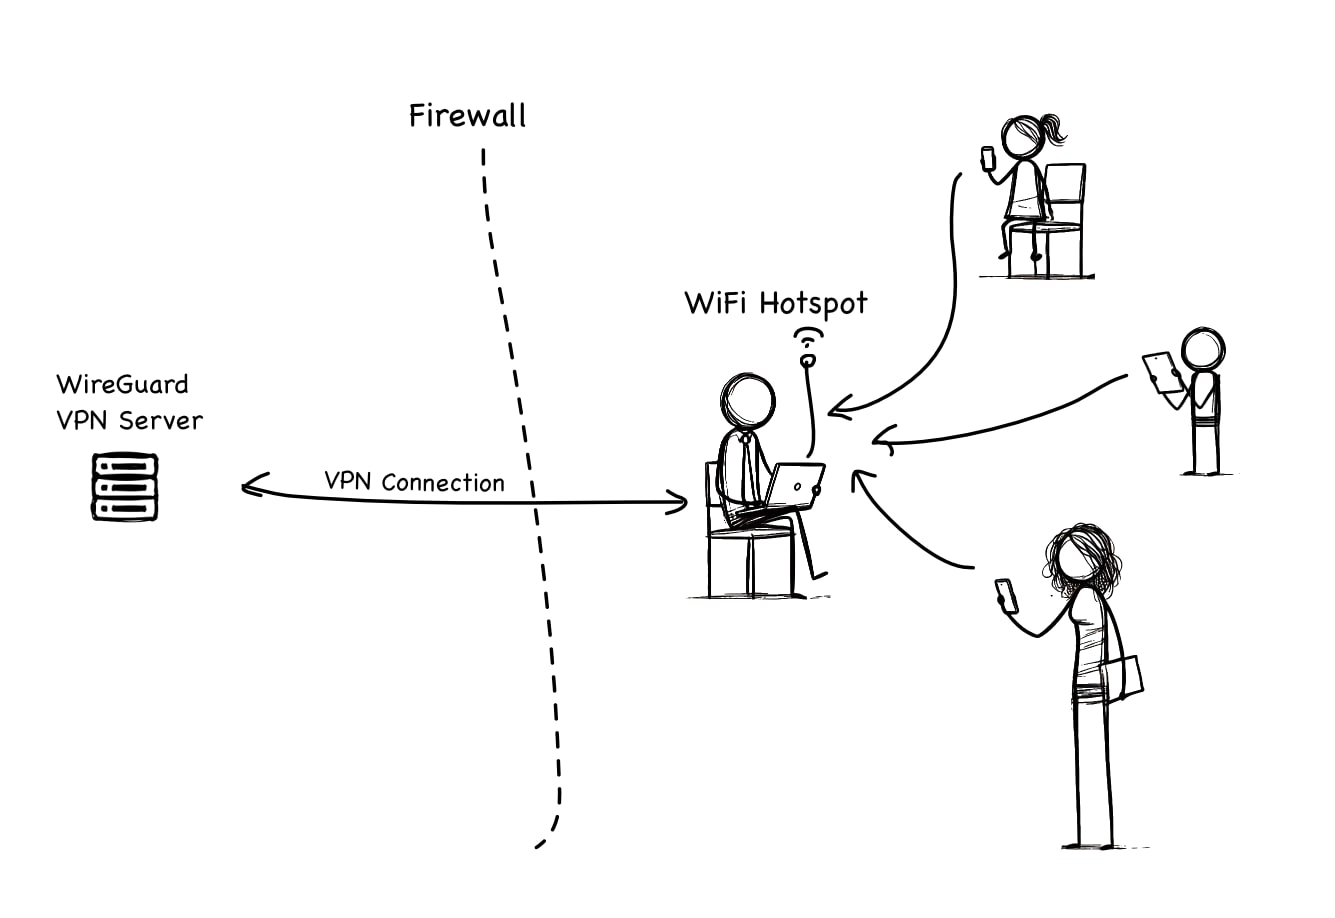
Imagine you're on a family vacation in a country with strict internet restrictions, and accessing your favorite websites has become a challenge. To ensure your family stays connected to the open internet, you can use your Windows laptop or an affordable mini PC/NUC to create a Wi-Fi hotspot that routes traffic through a VPN. This guide will walk you through the steps to set up a Wi-Fi hotspot on your Windows machine using the WireSock VPN Client.

Prerequisites
- A Windows 7 or later machine with Wi-Fi capabilities.
- An active VPN subscription that supports WireGuard configurations.
- The latest version of WireSock VPN Client installed on your machine.
- Administrative privileges on the Windows machine.
Steps to Set Up the Wi-Fi Hotspot
1. Install WireSock VPN Client
If you haven't already installed the WireSock VPN Client, download it from wiresock.net and follow the installation instructions.
2. Configure WireSock VPN Client
Obtain the WireGuard configuration file (
.conf) from your VPN provider.Place the configuration file in the WireSock VPN Client's configuration directory, usually located at:
C:\WireGuard\Rename the configuration file to
wg0.conffor simplicity.
3. Set Up the Wi-Fi Hotspot
There are two ways to create a Wi-Fi hotspot on Windows:
Method 1: Using the Built-in "Mobile Hotspot" Feature (Windows 10 and Newer)
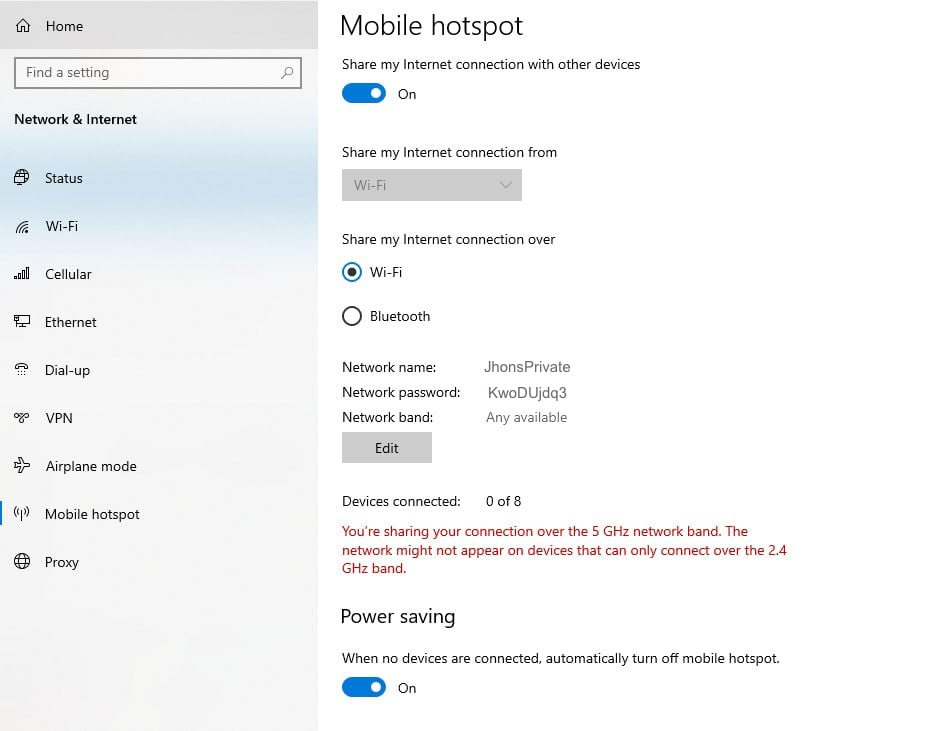
If you are running Windows 10 or later, you can use the built-in "Mobile hotspot" feature without resorting to command-line tools.
- Open Settings → Network & Internet.
- Select Mobile hotspot.
- Enable the "Share my Internet connection with other devices" toggle.
- Set a network name (SSID) and password if desired.
- Devices can now connect to your newly created hotspot using the displayed network name and password.

Method 2: Using Command-Line Tools (for Windows 7, 8, or Command Line Enthusiasts)
For older Windows versions (7, 8) or if you simply prefer the command line, you can create a hotspot using netsh commands:
- Open Windows PowerShell or Command Prompt as an administrator:
- Press
Win, typePowerShell, right-click on Windows PowerShell, and select "Run as administrator".
- Check if your network adapter supports hosting:powershell
netsh wlan show drivers
- Look for "Hosted network supported: Yes".
- Set up the hosted network:powershell
netsh wlan set hostednetwork mode=allow ssid=YourHotspotName key=YourPassword
- Replace
YourHotspotNamewith your desired Wi-Fi name. - Replace
YourPasswordwith a strong password.
- Start the hosted network:powershell
netsh wlan start hostednetwork
Once the hosted network is running, other devices can connect to it using the SSID and password you specified.
Use either of the above methods depending on your Windows version and personal preference.
4. Connect Devices to the Hotspot
- On your family's devices, search for Wi-Fi networks.
- Connect to the hotspot using the SSID (
YourHotspotName) and password (YourPassword) you set earlier.
5. Start the WireSock VPN Client
On the same Windows machine where you've configured the Wi-Fi hotspot, you now need to start the WireSock VPN Client. This ensures that all connected devices will be routed through the secure VPN tunnel.
Open Command Prompt or PowerShell as an administrator.
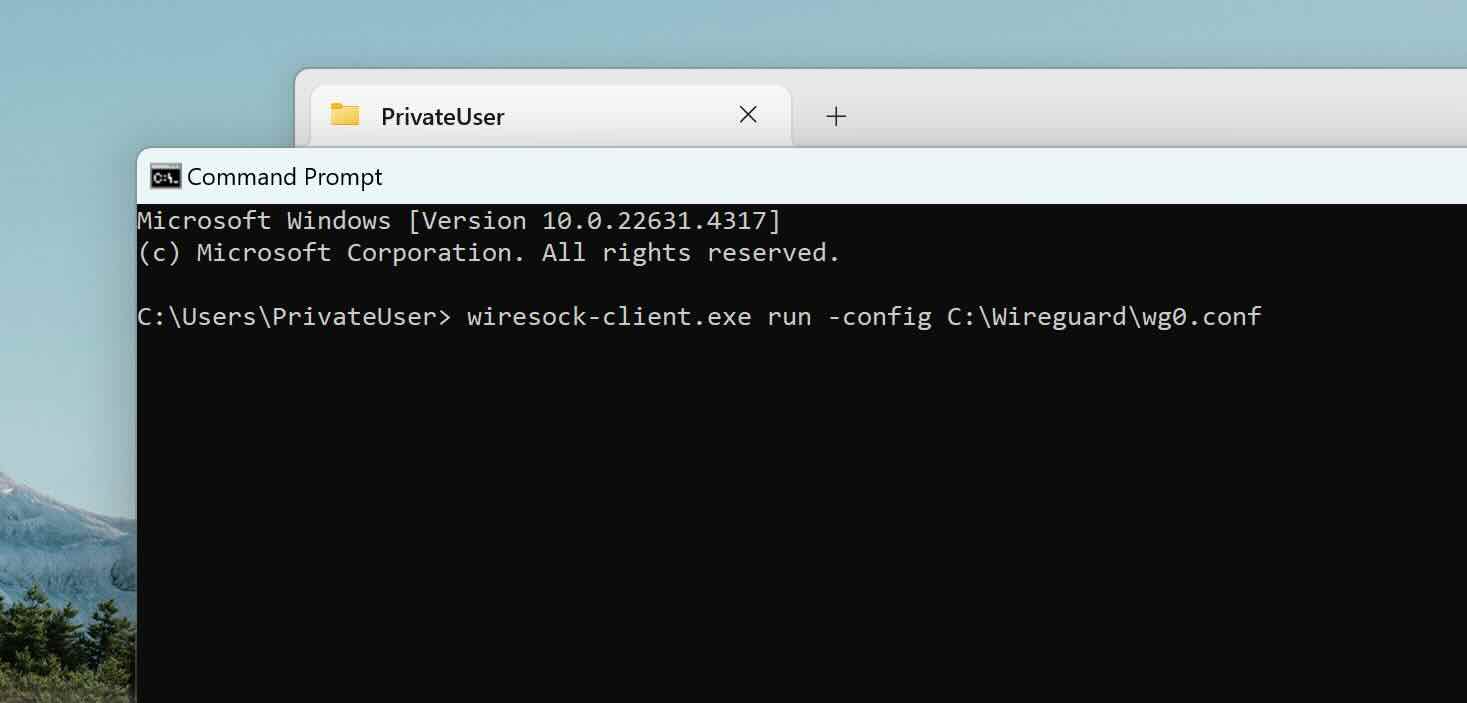
Run the following command, adjusting the path to your WireGuard configuration file if necessary:
cmdwiresock-client.exe run -config "C:\WireGuard\wg0.conf"Example:

Note
Adjust the path to your configuration file if it's different.
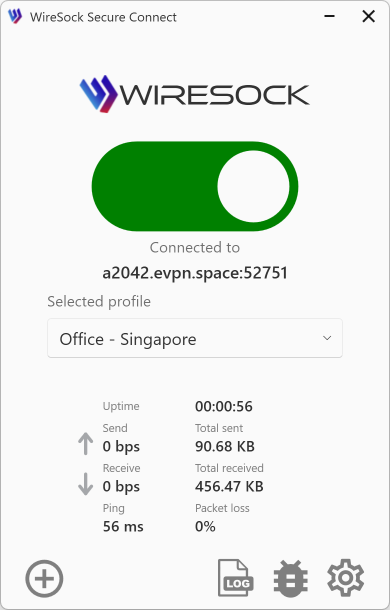
Once the WireSock VPN Client is running, it will establish a secure VPN tunnel. Any devices connected to your Wi-Fi hotspot will now have their traffic securely routed through the VPN connection.
6. Verify the Connection
- On a device connected to the hotspot, open a web browser.
- Visit Check IP to verify that the public IP address matches the VPN server's location.
- Try accessing a website that was previously restricted to ensure the VPN is working correctly.
Troubleshooting
Hotspot Not Starting: If you receive an error when starting the hosted network, ensure your Wi-Fi adapter drivers are up to date.
Devices Can't Connect: Make sure the hotspot is active and that you're using the correct SSID and password.
If you face any challenges with your VPN after installation or updates, a system reboot can often resolve these problems. Should the difficulties persist, reach out for support by posting a message in our dedicated
Security Considerations
- Always use a strong, unique password for your hotspot to prevent unauthorized access.
- Keep your VPN and system software updated to the latest versions for security patches.
Conclusion
By setting up a Wi-Fi hotspot on your Windows machine with the WireSock VPN Client, you can provide secure and unrestricted internet access to your family while abroad. This setup ensures that all connected devices benefit from the VPN's encryption and location spoofing, allowing you to bypass regional restrictions seamlessly.

