What is VPN split tunneling and how does it work?
Split tunneling is a powerful VPN feature that allows users to choose which traffic goes through the secure VPN tunnel and which traffic accesses the internet directly. This selective routing helps balance performance, privacy, and accessibility, making it especially useful in both personal and enterprise VPN scenarios.
How VPNs Work Without Split Tunneling
By default, when you connect to a VPN, all internet traffic is encrypted and routed through the VPN server. This ensures privacy and security but can also lead to:
- Reduced performance for non-sensitive tasks
- Inaccessibility of local network devices (e.g., printers, NAS)
- Restrictions when accessing region-specific content or services
What Is Split Tunneling?
Split tunneling solves this problem by letting users define which traffic should be routed through the VPN and which should use the regular internet connection. Split tunneling can be configured in several ways:
- By Destination (IP or Subnet) Only traffic destined for specific IP addresses or subnets is sent through the VPN. The rest goes out directly.
- By Application Only selected applications (e.g., browser, email client) use the VPN, while others (e.g., streaming apps) bypass it.
- Inverse Split Tunneling All traffic goes through the VPN except for specified destinations or applications.
Use Cases
- A remote employee accesses internal company systems via VPN while browsing the internet locally.
- A gamer routes only game traffic through the VPN to reduce latency while keeping video streaming traffic outside the VPN.
- A user in a restricted country accesses foreign news sites through VPN but uses local apps directly to reduce bandwidth.
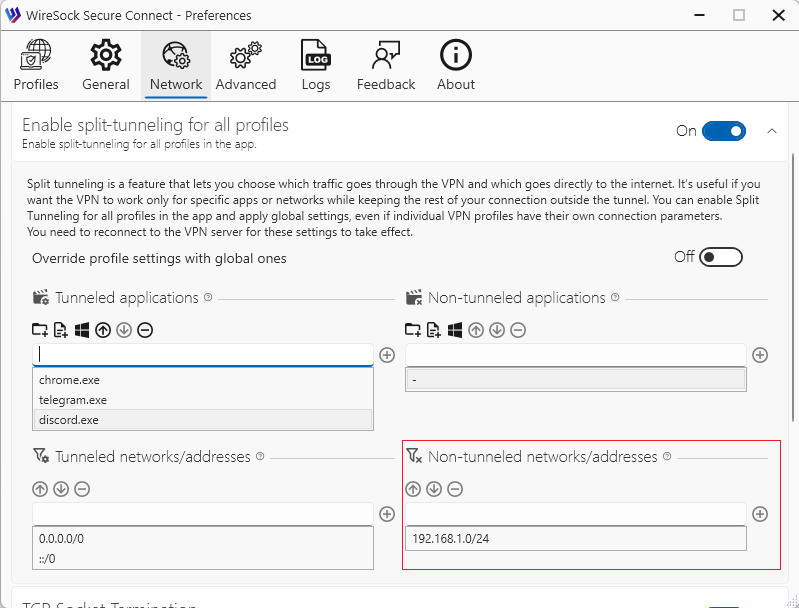
How to Enable Split Tunneling
Depending on your usage scenario, you can configure split tunneling settings individually for each profile or define global split tunneling settings that apply to all profiles in the application.
Global settings are configured on the Network page. Profile-specific settings are configured on the Profile Edit page.
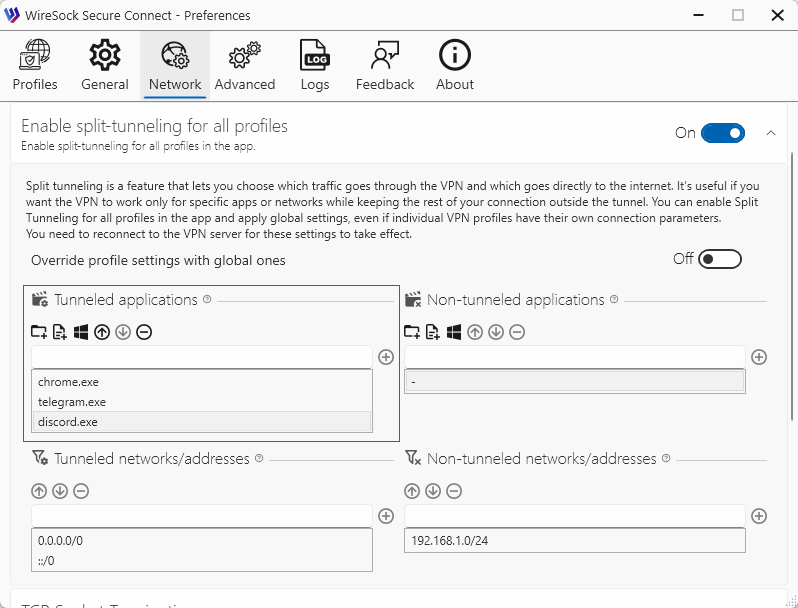
1. You need only specific applications (e.g., a browser) to use the VPN tunnel
Add these applications to the Tunneled applications list.
- Go to the Tunneled apps section.
- Use the
 Add file,
  Add folder, or
  Add process buttons to:
 - add a specific application (by full path or file name),
- include all applications in a folder,
- or select a currently running process.
- You can also manually add entries using the text field by clicking
+. Wildcards (*) are supported — for example,ch*matches all applications whose filenames start withch.
See more details at Edit a Profile or Network.
2. You need to route all traffic through the VPN, except for certain applications.
For example, you need all applications to use the VPN, except for your corporate CRM system, which should operate outside the VPN. In this case, you should add the application to the Non-tunneled apps.
Add the application to the Non-tunneled apps list.
- Go to the Non-tunneled apps section.
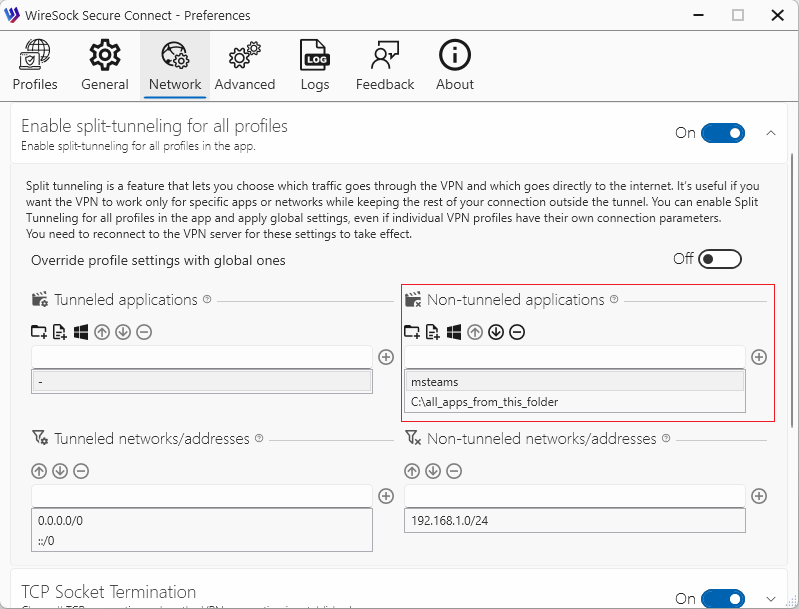
- Use the Add file, Add folder, or Add process buttons to:
- add a specific application (by full path or file name),
- include all applications in a selected folder,
- or choose a currently running process.
- You can also manually add patterns using the input field by clicking +. Wildcards (
*) are supported — for example,ch*will match all applications whose names start with "ch".
See more details at Edit a Profile or Network.
3. You need to route a specific network (or multiple networks) through the VPN tunnel.
For example, if you need to tunnel only your corporate network. In this case, you should add the network(s) to the Tunneled networks.
NOTE
This mode is intended for advanced users who are familiar with networking.
- Go to the Tunneled networks section.
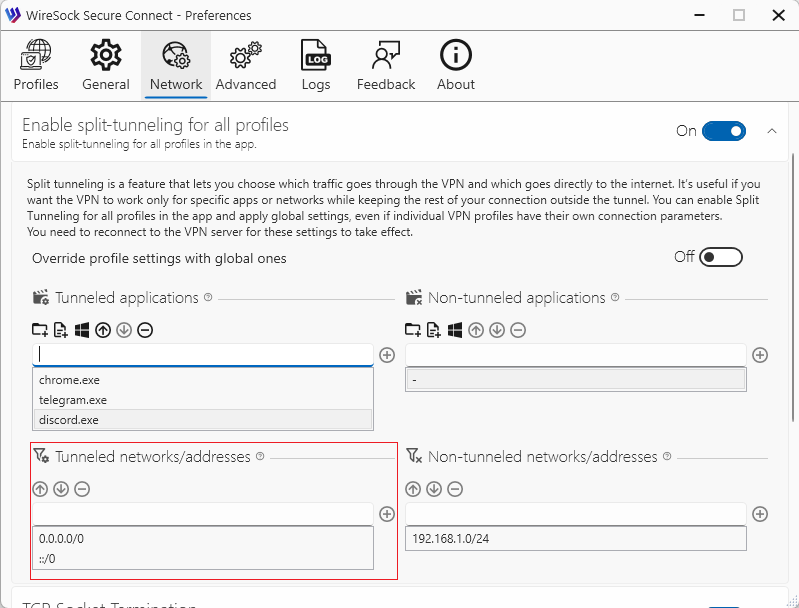
- Manually enter the network(s) to be routed through the VPN using CIDR notation. You can add multiple networks at once, separated by commas. For example:
0.0.0.0/0, ::/0will route all IPv4 and IPv6 traffic through the VPN tunnel.
See more details at Edit a Profile or Network.
4. You need to route all traffic through the VPN, except for certain networks.
- Go to the non-tunneled networks section.
- Manually enter the network(s) to be routed through the VPN using CIDR notation. You can add multiple networks at once, separated by commas. For example:
0.0.0.0/0, ::/0will route all IPv4 and IPv6 traffic through the VPN tunnel.
See more details at Edit a Profile or Network.
5. You have complex requirements for network and application traffic routing.
Your setup requires a combination of applications and networks whose traffic should be routed through the VPN tunnel, as well as applications and networks that should bypass the tunnel.
In this case, you can use a combination of options 1–4. Please note that when using such a combination, a logical AND condition is applied. For example, if both Tunneled networks and Tunneled applications are defined, traffic will be routed through the tunnel only if both of the following conditions are met:
- The destination IP address matches an entry in Tunneled networks
- The application generating the traffic is listed in Tunneled applications